Followers

Monday, October 13, 2014

Two Artist Highlights and New Mini-eyecandy!


Ok, I am here again.
The Chess-taurant is pretty much completed except for a few structural things. I will not show it until I get those figured out and solved. I also wanted to electrify it, but missed the class with the world famous Carl Sahlberg in Nashville because I had guests from out of town. I spoke with Mr. Sahlberg and it may be next year before he holds another class. I will be there no matter what! More of his work here.

I want to share some really cool stuff with all of you. From some really cool artists! I believe the method from the first artist can be used with miniatures. It is such a cool method. I wish I knew what was in that bowl though.

I was never really into Halloween. For those who are, the second artist's work is perfect for this season!

I don't know either of these artists. I just thought you would get some enjoyment from them.

http://www.littlethings.com/thats-not-real/?utm_content=buffer4bed3&utm_medium=Facebook&utm_source=littlethings&utm_campaign=littlethings

http://www.fastcodesign.com/1662890/lori-nixs-stunning-tiny-dioramas-depict-an-abandoned-world-slideshow#8 hover over the pictures for commentary.

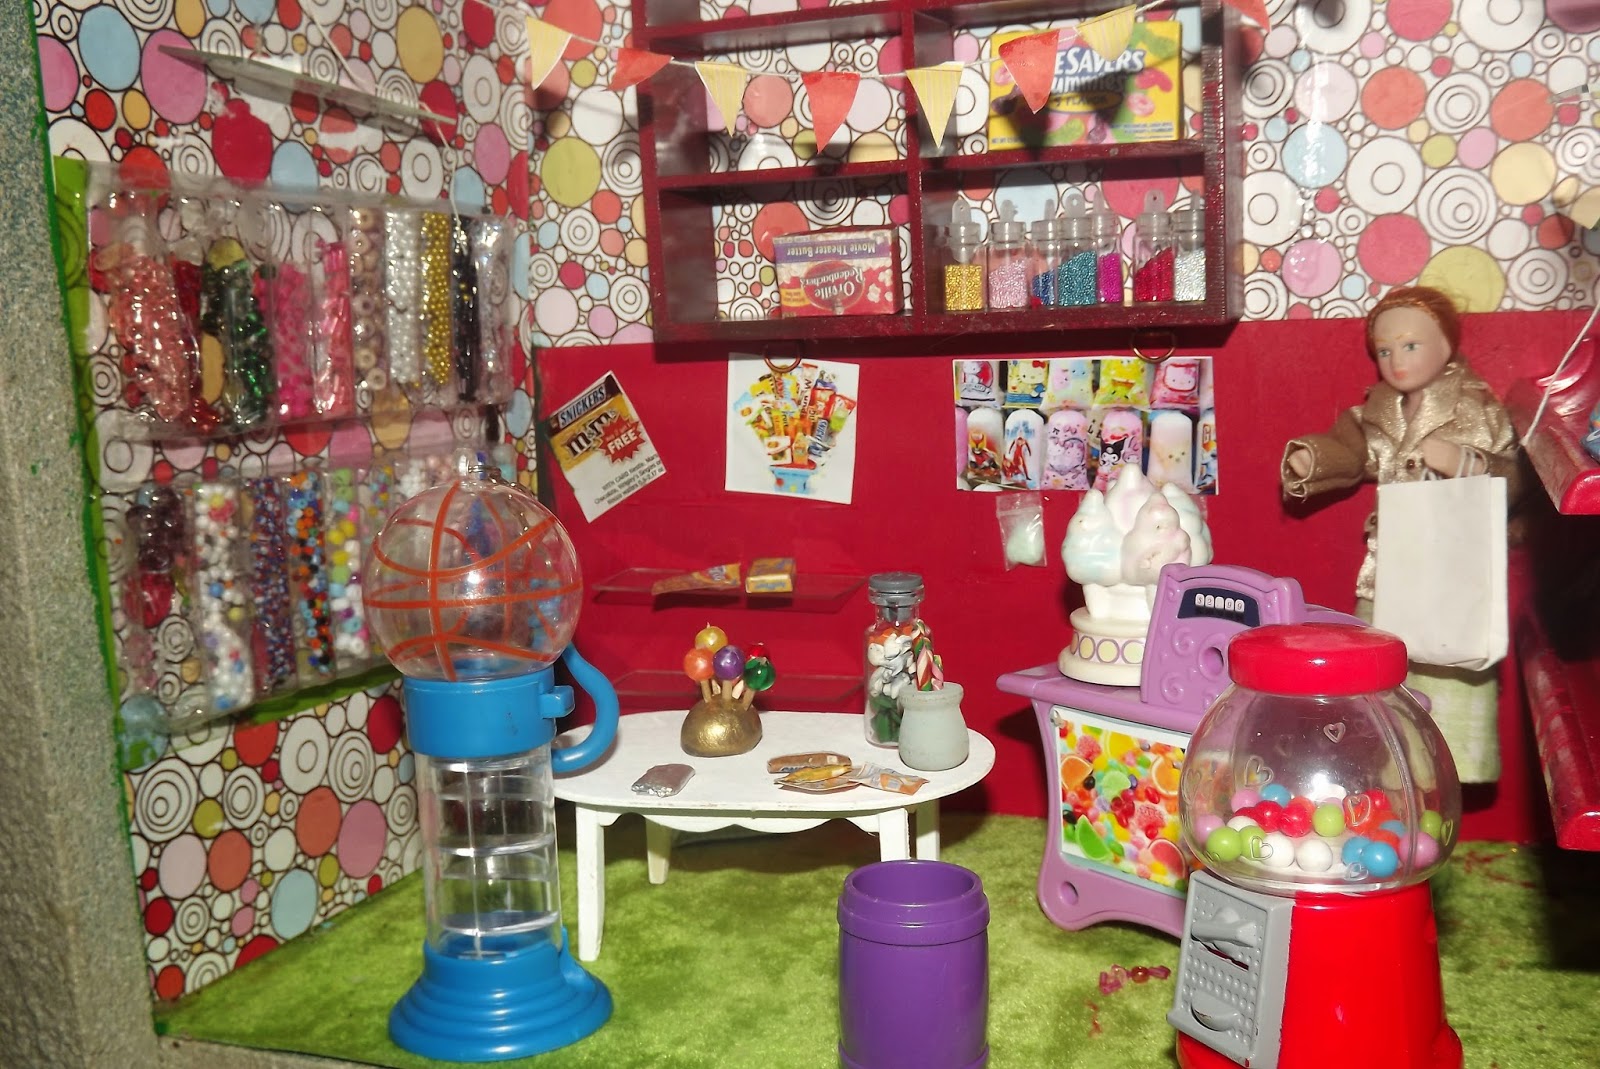
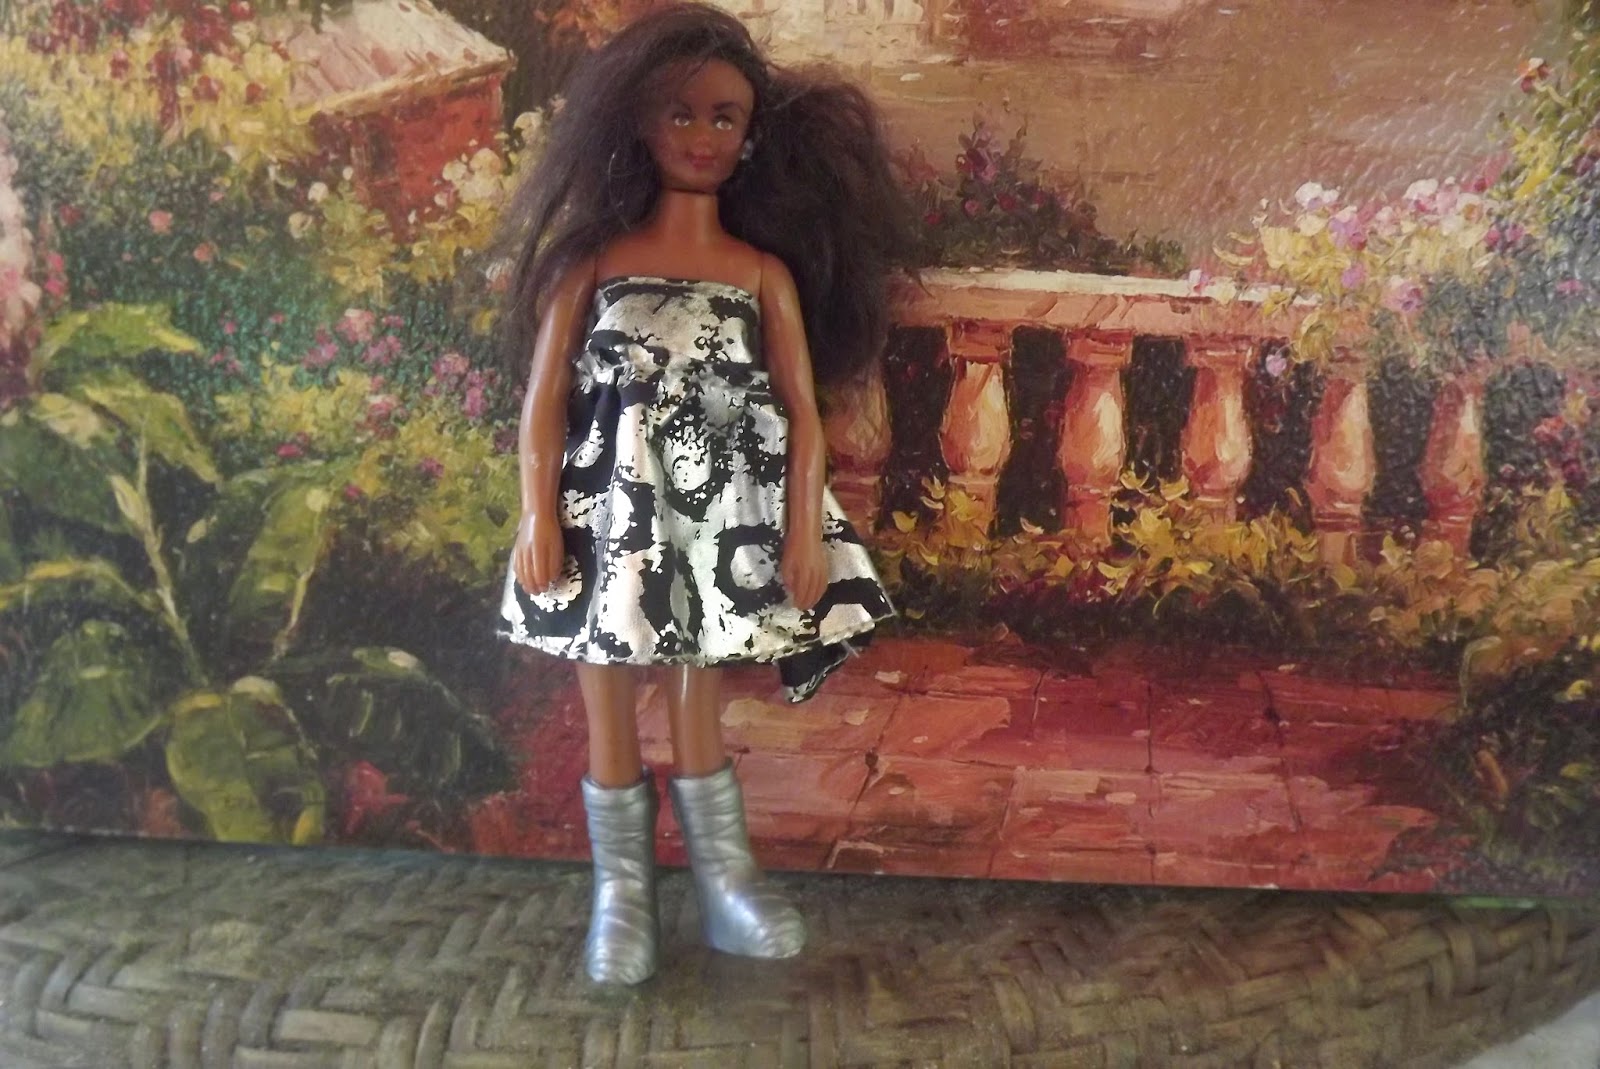
Here are a few of my purchases from the past few months. Also, there are new items in my Etsy store. There will be more added very soon. Click on the Etsy sign on the right!

P.S. I don't know what that blur is from in some of the pictures...a ghost maybe? Woooo!!
PPS yes. that is a filled funeral urn to the right of the church! More Woooo!

This is the front of a wooden church. I have lots of stuff to go in there already!
 It actually came just like this.
Side view. It needs a nicer roof.

Check out the paint job in there! The interior is already close to finished! Yay!

 
I had no idea these pieces I recently purchased would look so great here. I originally bought them for a dining room in a house. They will be part of either a church dining hall or where the ministerial staff will sit or maybe even the ministers office. I just hope they will look the right scale when I get everything in there.


Got this from a yard sale. It came with two large cardboard boxes filled with parts and accessories including electrical items, food and even a 1:12 gazebo kit! This box was like this so I don't know if all of the pieces are there.  It looks like they are.  Anyway, since it was partially completed I grabbed it! That ten is not the price. Wish it were. lol


The front. It can go in a lot of different directions! At the next yard sale after I bought this...guess who I ran into! My dolly friend. Glad I found this and got to it first! By the way she has created some awesome mini businesses in her huge mini "town!"
These colors are a bit boring...they will be changed. There it goes again...woooo!


I passed by this several times without noticing it. It was sitting atop an empty clothing rack in a thrift store and looked like part of it.  I had the feeling there was something in the store  waiting for me to buy it. So I kept looking.  It was when I decided to leave that I noticed it and asked the price. The cashier gave me one. The manager said it really was not to be sold. Several people had previously inquired about it, but since she gave me a price they would sell it to me. Can you believe it! It was waiting for me! Just imagine it with jewels around the top and lots of cool carousel rides. The two bases are wood and the middle part is hollow meaning it can probably somehow be electrified. The can is to show the size.


This shelf just jumped out at me while I was in line at a thrift shop. I want to make just one formal scene to appear to have an upstairs and downstairs as if at a concert hall, mansion parlor- something which I could hang on a wall. The gold stays.


I was so excited to get this because the doors open and close...but when I got it home my little construction company owner man didn't fit :-(. I have shorter guys and gals so I am sure someone will.:-)
 Hope you enjoyed it. I promise not to take such a long break between posts next time. :-)

Click on pictures for a larger view

Tuesday, September 23, 2014

ALMOST THERE!


First, thank you, thank you, thank you to everyone who left those awesome comments! You have no idea how much that encourages me! Welcome to my new followers! Hugs to my, old, er, loyal followers/supporters! LOL I have been crazy busy these days! But, I just wanted to squeeze in a few pictures of some of the mini-ing I have been able to do. I constantly walk past the Chess-taurant, add/change something then keep moving until I can do a little more later!

 Since the last post, I have added the pictures on the wall, changed the bathroom signs (still king and queen), added wallpaper and chair rail to the back wall, added the cooler with the pot pies I made years ago, changed back to the original smaller counter-then added a new top to it, on the left wall you will see a little "free wifi" sign, changed window frame from gold to brown and on the back wall you will see a keep calm and play chess sign and a few other odds and ends. There are just a few more things left to do. Look for more teeny details when I am finished. I still have a bit of teeny and "big" items to add believe it or not! So far I am pretty happy with the way it is turning out. :-)

When I am finished I will go over all of the little tricks I learned along the way and go more into detail.

Be Back Soon!


I know the picture on the wall is crooked. My arm got tired trying to get them even! I will try again later :-/  Of course the cash register will not remain Barbie pink!


I like these two signs better.
They seem to go with the tone of the Chess-taurant better


I wanted to add the rest of the outdoor scene in the window, but my printer is making everything look red-ish for some reason...sigh
 

If you look at the picture above you will see this sign next to the "window" (yes, I know I need to trim that wood. I will explain later) The window frame gets another coat or so of paint


This customer went to the restroom...I wonder if it was the King or Queen? hmmm lol (pssst, do you know you left your e-reader on the table?)


I made these pot pies a couple of years ago just to try them out. Those are plastic Barbie cake slices. Sorry you can't see the credit cards we accept...we will take whichever one you have! :-)

That is a US penny sitting atop the chess set that someone is going to be playing with.

The counter stools are missing and getting some touch ups right now. The back wall is going to be filled up and other items added all over

This should be the next to last post on this project. The next post will show the finished product!

                              Remember, click on pictures for a larger view!

Thursday, September 11, 2014

CHESS-TAURANT UPDATE!

Hi everybody!

WOW! I can't believe I have not posted since July! I totally missed August! Well, I am here now and want to show you a few updates of the Chess-taurant. I plan to do a few things more tomorrow so I will be closer to finished or finished. There will be more details because we know how important details are for a mini scene. There are also wall etc. touch-ups

Sorry, everything looks a bit jumbled. This was just to share something with you in case I don't get to post again within the next few days. Things will be neater once finished.

Don't forget to tap on the pictures to make them bigger!


Front view. The scene from the window on the left is  from photo I took of the outside of the Chicago Art Institute. I still have one more panel to put in and work on the window frame 

Things are still a little out of place. The window frame is actually the mat from a picture frame painted gold. I don't think I will keep it that color. The right wall will have framed pictures.

Right under the posters on the wall will go a cooler. I made the barstools.
The bowl is one half of a party favor rattle. I will go more into detail on the other things in the next post.

Sorry you can't see this very well. These are chips I made from clay


I made the platter of sandwich rolls and the sparkling cider bottles were once bowling pins.

The right wall needed something so I decided to make it comfortable with a fireplace like Panera Bread or Atlanta Bread company restaurants.

This is the women's restroom. It says "Queen" on it and the men's says "Kings."
Sorry you have to turn your head to see it. lol I just couldn't seem to get it right side up!  I will have to take a better one
 HOPE YOU LIKE IT!
 
( I have more projects I have been working on to share with you soon!)
 
Click on picture for a larger view

Thursday, July 31, 2014

SLJ Info

 Ok everybody! Thanks to Sarah of Amber's house I was able to get things back into English! The weird part is when I tried to use a translator it identified the other language as English! Glad that is over with. Thanks again Sarah!


Several people commented on Samuel L Jackson's mold. He is a Star Wars character Samuel plays named Mace Windu I got new from a thrift shop a few years ago in a damaged package. He is one of my favorites. I just took him out of the box and put him on display. Today I counted 9 points of articulation including waist and neck ( or would that be 16 counting both sides?)  It seems he may have had his sabre. I can't remember.

 Star Wars: Episode II Mace Windu 12" Action Figure (Photo: Amazon.com)
 

Close-up showing teeth
 
Ok, here is the weird part. The stamp on his back says Hasbro 1993. He didn't star in the Star Wars prequels until 1999!
 
Click on pictures for a larger view

Wednesday, July 30, 2014

For some reason blogger dashboard is all in what I believe is Turkish. Here is an example:

ቅንብሮችን ይለጥፉ      ለጥፍ

Can anyone tell me why? Or at least tell me what this says? There are two words in English...the rest are this language!


Friday, July 25, 2014

TJ X 4= 1


Since I cleared out the  Barbie area, I started digging out my Barbie stuff.  When I looked at these four guys,  all are the SAME TJ,  from the Kenya doll collection I knew I wanted to put them in a house or diorama, but who wants to have four of the same dolls?

I  actually went a little crazy when I bought them almost for free at Wal-Mart and set them aside a couple of months ago, then ordered some flocking from online. When the flocking finally arrived from china I could not wait to try it on them. I wondered how different from each other I could make them look.

I am satisfied with how they turned out. Each one now has his own look and personality.  Here are two that had hair make-overs and one original. I was so busy buying them I didn't realize there were four different outfits which furthered their individuality. I still have a couple more and have not decided what to do with them and one more has a different outfit. I held up some grey hair, but it didn't look quite right.
 
I am actually outside at night taking these pictures. I have decided this Barbie Dreamhouse will be a venue of some sort. Just seems parties should be held here.

He was actually the last to get a do over. For some reason there is something dusty by his mustache. He must have been eating something lol. I think he looks similar to singer Stevie Wonder.
 
Here he is with hair compared to the original bald look. I think hair makes him look younger. SAME DOLL!


I was hoping I could get him to have an afro like this guy
It was tricky and there are a few naturally thin spots, but I think I will still fill them in. Basically I am pleased.
Don't they all look different now?!
 
 
WHO IS WHO?
A few posts ago D7ana talked about LGBT in fashion dolls on her blog. A few days before her post I had taken this photo because my Samuel L Jackson Star Wars doll was in this position. Um, I think we can assume he is heterosexual!

None of my ladies seem to be able to escape his charm!

So, this is what they do when I am not looking!
The weird part is a Samuel L Jackson commercial came on while I was doing this post. LOL


You can never know what I am going to blog about next. I am currently working between two scales and still organizing in 1:1 scale. LOL


Click on picture for a larger view

Friday, July 11, 2014

Organization...Catch it! It is Contagious! & Artist Highlight!


Hi everyone!

 Two posts in one day!?

I can't explain it. It just happened! Ok, there are always things I could be doing other than working on minis. Given a choice, I usually chose minis! The last few months, I have not put much time into them or even the blog choosing to do other things. Well, I had fun, but minis were always in the back of my mind.

ARTIST HIGHLIGHT!

And then it happened! I saw Hey it's Muff's last post. It was on organizing her fashion dolls et al.  When you go to her blog you can be sure you will come away having learned something new, fun and useful! I wish I were as skilled as she is. Her blog is such a positive place and her pleasant, friendly and playful personality really shines through as she shares her knowledge with everyone!  Isn't that why we all log into mini world? Stop by her blog and educate yourself while having a few giggles.

Anyway, something inside of me became motivated and I started cleaning, sorting and organizing my doll studio like a mad woman! The more I did, the more...I did! That was the answer! Clutter and disorganization dampened my creativity. Before then every time I would go in there I would do a little then just stand there not knowing what to work on next and I wasn't satisfied with what I did work on.

Now, I have created the Barbie section in the outer room liked I always wanted. I had to dismantle my beloved park. I tried setting it up in another location temporarily. It has to be moved to a better spot that will give it justice.

In my madness I got an idea for a high rise office building overlooking a park in the 1:12 room. I like it because it adds a modern-urban look. I may tweak it and remove most of the park area out front.

Today is the third day and I still have the organization bug! Sometimes we just need a little positive energy from our friends.

Thanks Muff! :-)

The shelving on the right will be changed to Barbie dioramas to keep the theme in this section. Right now there are 1:12 scenes. Landscaping will spruce up the neighborhood.  Something will have to be done with that boring wall. The car parked out front is actually a radio!


I bought this Barbie house the day before the organizing blitz. Would you believe it was only $5! I  just placed here, but with a little clean up and remodeling plus nice window curtains in the background the whole area will be gorgeous! I already had the shelving section at the bottom. It will become two more rooms!


Sitting out on the  side balcony watching the sun go down


I didn't realize how much Barbie stuff I had.
There is a boxful waiting to become dioramas.
 

The 1:12 Room
       
Two views of  the table with the office high rise and part of the park in the front. They are two shelves one placed on top of the sideways one on the bottom. I like them because they add a touch of urbanism to the 1:12 room. I like the atrium area.
 I have two more shelving sections left. Wondering where they may pop up. hmmm

These guys are just hanging out in the lobby for now  :-)


These are a few additions to current projects. Before now, I just couldn't really get into them like I wanted.
 
The partially finished bathroom in the big house. Some things like the tub tile wouldn't cooperate. I have a few more great features waiting to be installed

 
 The Chess-taurant.
 
That is a window frame on the left wall. It is not attached. I could not find just the right window scene to go in there. Then my printer would not function right sometimes. I had to back off for a while. There are a lot of accessories waiting to be added to the room. Note the chalkboard menu specials sign on the front left

I tried out the logo on to-go bags and a menu

 
The candy store in the Mall
Here are the new glass shelves in the mall candy store. I still need to make lots more candy to fill them! Click on the picture to see the details!


A bit more work and I will be finished. The candy dispenser on the left wall is micro beads glued into acrylic battery packaging. The shelving in the top picture on the right wall used to be scrabble tile holders now painted red.

More pictures to come soon!
 

 Click on pictures for a larger view

Thursday, July 10, 2014

A Little Fashion Help From My Friends


There is a blog I follow called Desperately Seeking Dolls. The dolls in her collection is fabulous! She also shares the dolls on her wish list. So often I wish 1:12 dolls were so glamorous. I knew I was going to if not complete a repaint at least change a few things on one of my dolls at some point.

One day, while enjoying the posts I follow, I saw an action packet from the dollar store on a blog called Hey it's muff. I had the feeling the little boots (actually a cast!) would fit someone in my mini town. I looked in two stores before I found three packs at a dollar each. Since each pack only had one boot that meant I would have one and a half pairs of boots. lol

My intention was to mock them up by painting or adding other things. I did a fitting on one doll and fell in love with the way they fit. This particular doll has on permanent pumps which makes it very difficult to give her a change of shoes. You may remember her as Niecy the boutique owner from my doll stories. By the way, I am still getting scenes together to start them up again. The opening in the back will be closed with silver duct tape.

 Her dress is a Monster High skirt. This outfit gave me the courage to glam up her make-up.I gave her some new eyebrows (modeled after Desperatly Seeking Dolls' friends), refreshed her lipstick and blush. Her hair is a mohair  wig I ordered a couple of years ago. I wish I could remember who I ordered it from. It looked better when I first got it. I will have to either tame it, have her get a reroot or just make another wig.


Just trying on for size. I would like to add a little cuteness to the next pair


They are just on the border of looking weird or like casts (which they are supposed to be :-)

The split makes them fit well but a little silver tape couldn't hurt!


How about a glamour shot. lol
 P.S. Hey Muff your name will be mentioned in the next post too!
 
 
Click on picture for a larger view


Monday, June 23, 2014

Hope to see you soon!

Hi everybody!

Blogger is acting really wacky these days! It won't let me see more than one of the blogs I follow at a time and stays on that one post! I know I am missing really great posts, because that is why I follow you in the first place! I hope I can get back to you soon!

Lots of love and hugs
Grandmommy

Monday, June 16, 2014

Shelve It!

Hi Everybody!

Life should be slowing down in about a week or so. Then I will have more mini time (crossing fingers). I still think of them all of the time even when I can't get to them or blog about them. This post actually took me a week to get up!

I just had to show you this. I have had this idea for a long time. I finally decided to try it. Most of you probably already know about this trick. I wanted shelving and I didn't want to have to do a lot to get them looking right. You know, keep it simple. I also wanted the look of floating shelves with no brackets.

So, I bought some inexpensive microscope slides. The box of 72 came last week. I was anxious to try them out. I had to move everything around in the shops. When I put everything back in place, I know they will look great! Take a look at the shelves all over the place! I only had around 50 slides left within 15 minutes. LOL Perfect! Most of them went into the mall. I did put some in the Chess-taurant, though I really need to fix them better.

Now to order the slide covers for other ideas!

I had to make the pictures somewhat dark in order for you to see the shelves well.
CANDY STORE: I can put so many more goodies here now!
 
MEN'S STORE: Sorry I had to make it dark so you could see them better.
I also put some on the opposite wall


BRIDAL SHOP: The dove on top looks like he is flying, but he is on the glass shelf
 

SHOE STORE: On the upper left you can see more shelving.
 
 
This will be the new,
JEWELRY STORE:  You can be sure there will be shelves there too!

I do have a few tips for using them.

1. Try to keep them vertical while putting the glue on. I used superglue on most surfaces and just let it slide down the side.   After a few tries, you can do it without it getting glue on the flat shelf surface.

2. Remember you can not reposition if you use superglue so get it right the first time. It wouldn't stick on some wallpaper at all.

3. Once you get  superglue on the sticking side surface, you must clean it off well before trying to
 re-glue if it didn't stick the first time. It just won't stick to itself and the other surface.

4. Make sure the side you are gluing is flush against the wall so it won't be slanted when dried.


                                               Click on picture for a larger view